Craving Crafts?

September 25, 2019
by Kevin
It’s no secret that OT 406 Foundations: Creativity, Craft and Activity is one of the most fun courses during your first summer session for the Entry-Level Professional Master’s. Unfortunately, the summer is over and the crafts have been put away, but that doesn’t mean you have to stop crafting and letting that creativity flow! Here is one my favorite crafts to help satisfy your crafting craving.

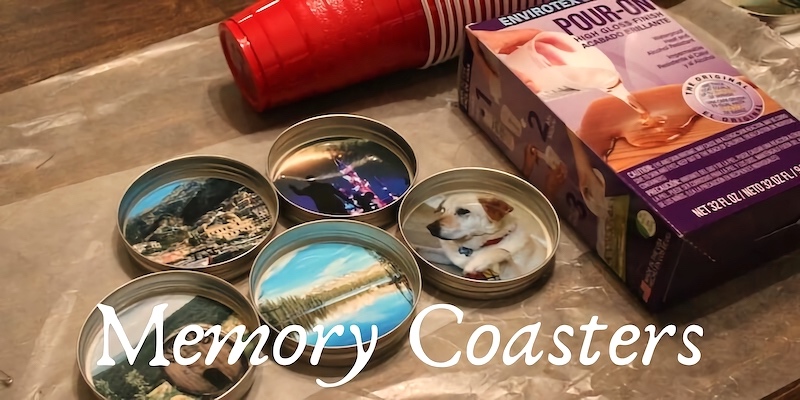
Memory Coasters
Have some pictures laying around that you would like to display creatively in your home? These memory coasters are the perfect way to show-off all those “instagramable” locations and start a conversation at dinner.
Materials needed
- Scissors
- Self-sealing lamination sheets or laminator
- Pictures
- One-Piece Mason Jar Lids, Wide Mouth
- EastCast Clear Epoxy
- Plastic Cups
- Stirring Sticks
- Gloves
- Wax Paper
- Double-sided Tape
- Marker
Directions
- Trace a circle around the portion of your photo you want to place in your coaster using the bottom of the Mason jar lid.
- Cut out the circle you just traced, then laminate your photo using either a lamination machine or self-sealing lamination sheets. Laminating the photo is an important step, as sunlight and the clear resin will pull the color out of the photo if not protected.
- Cut the laminated photo out a second time and secure the photo in the bottom of the Mason jar lid using adhesive or double-sided tape.
- Place Mason jar lids on a double layer of wax paper to protect the surface you are working on.
- Mix the clear epoxy resin using the directions provided with your resin and be sure to wear gloves and an apron to protect your skin and clothes. Pour epoxy resin into the Mason jar lids until the lid is about halfway full.
- Allow the epoxy resin to dry indoors where the coasters will not be disturbed for about 72 hours. Finally, pour yourself a drink and enjoy your beautiful memory coaster.
⋯
Next by tag Classes ⟩ Life Hacks ⟩
⋯


